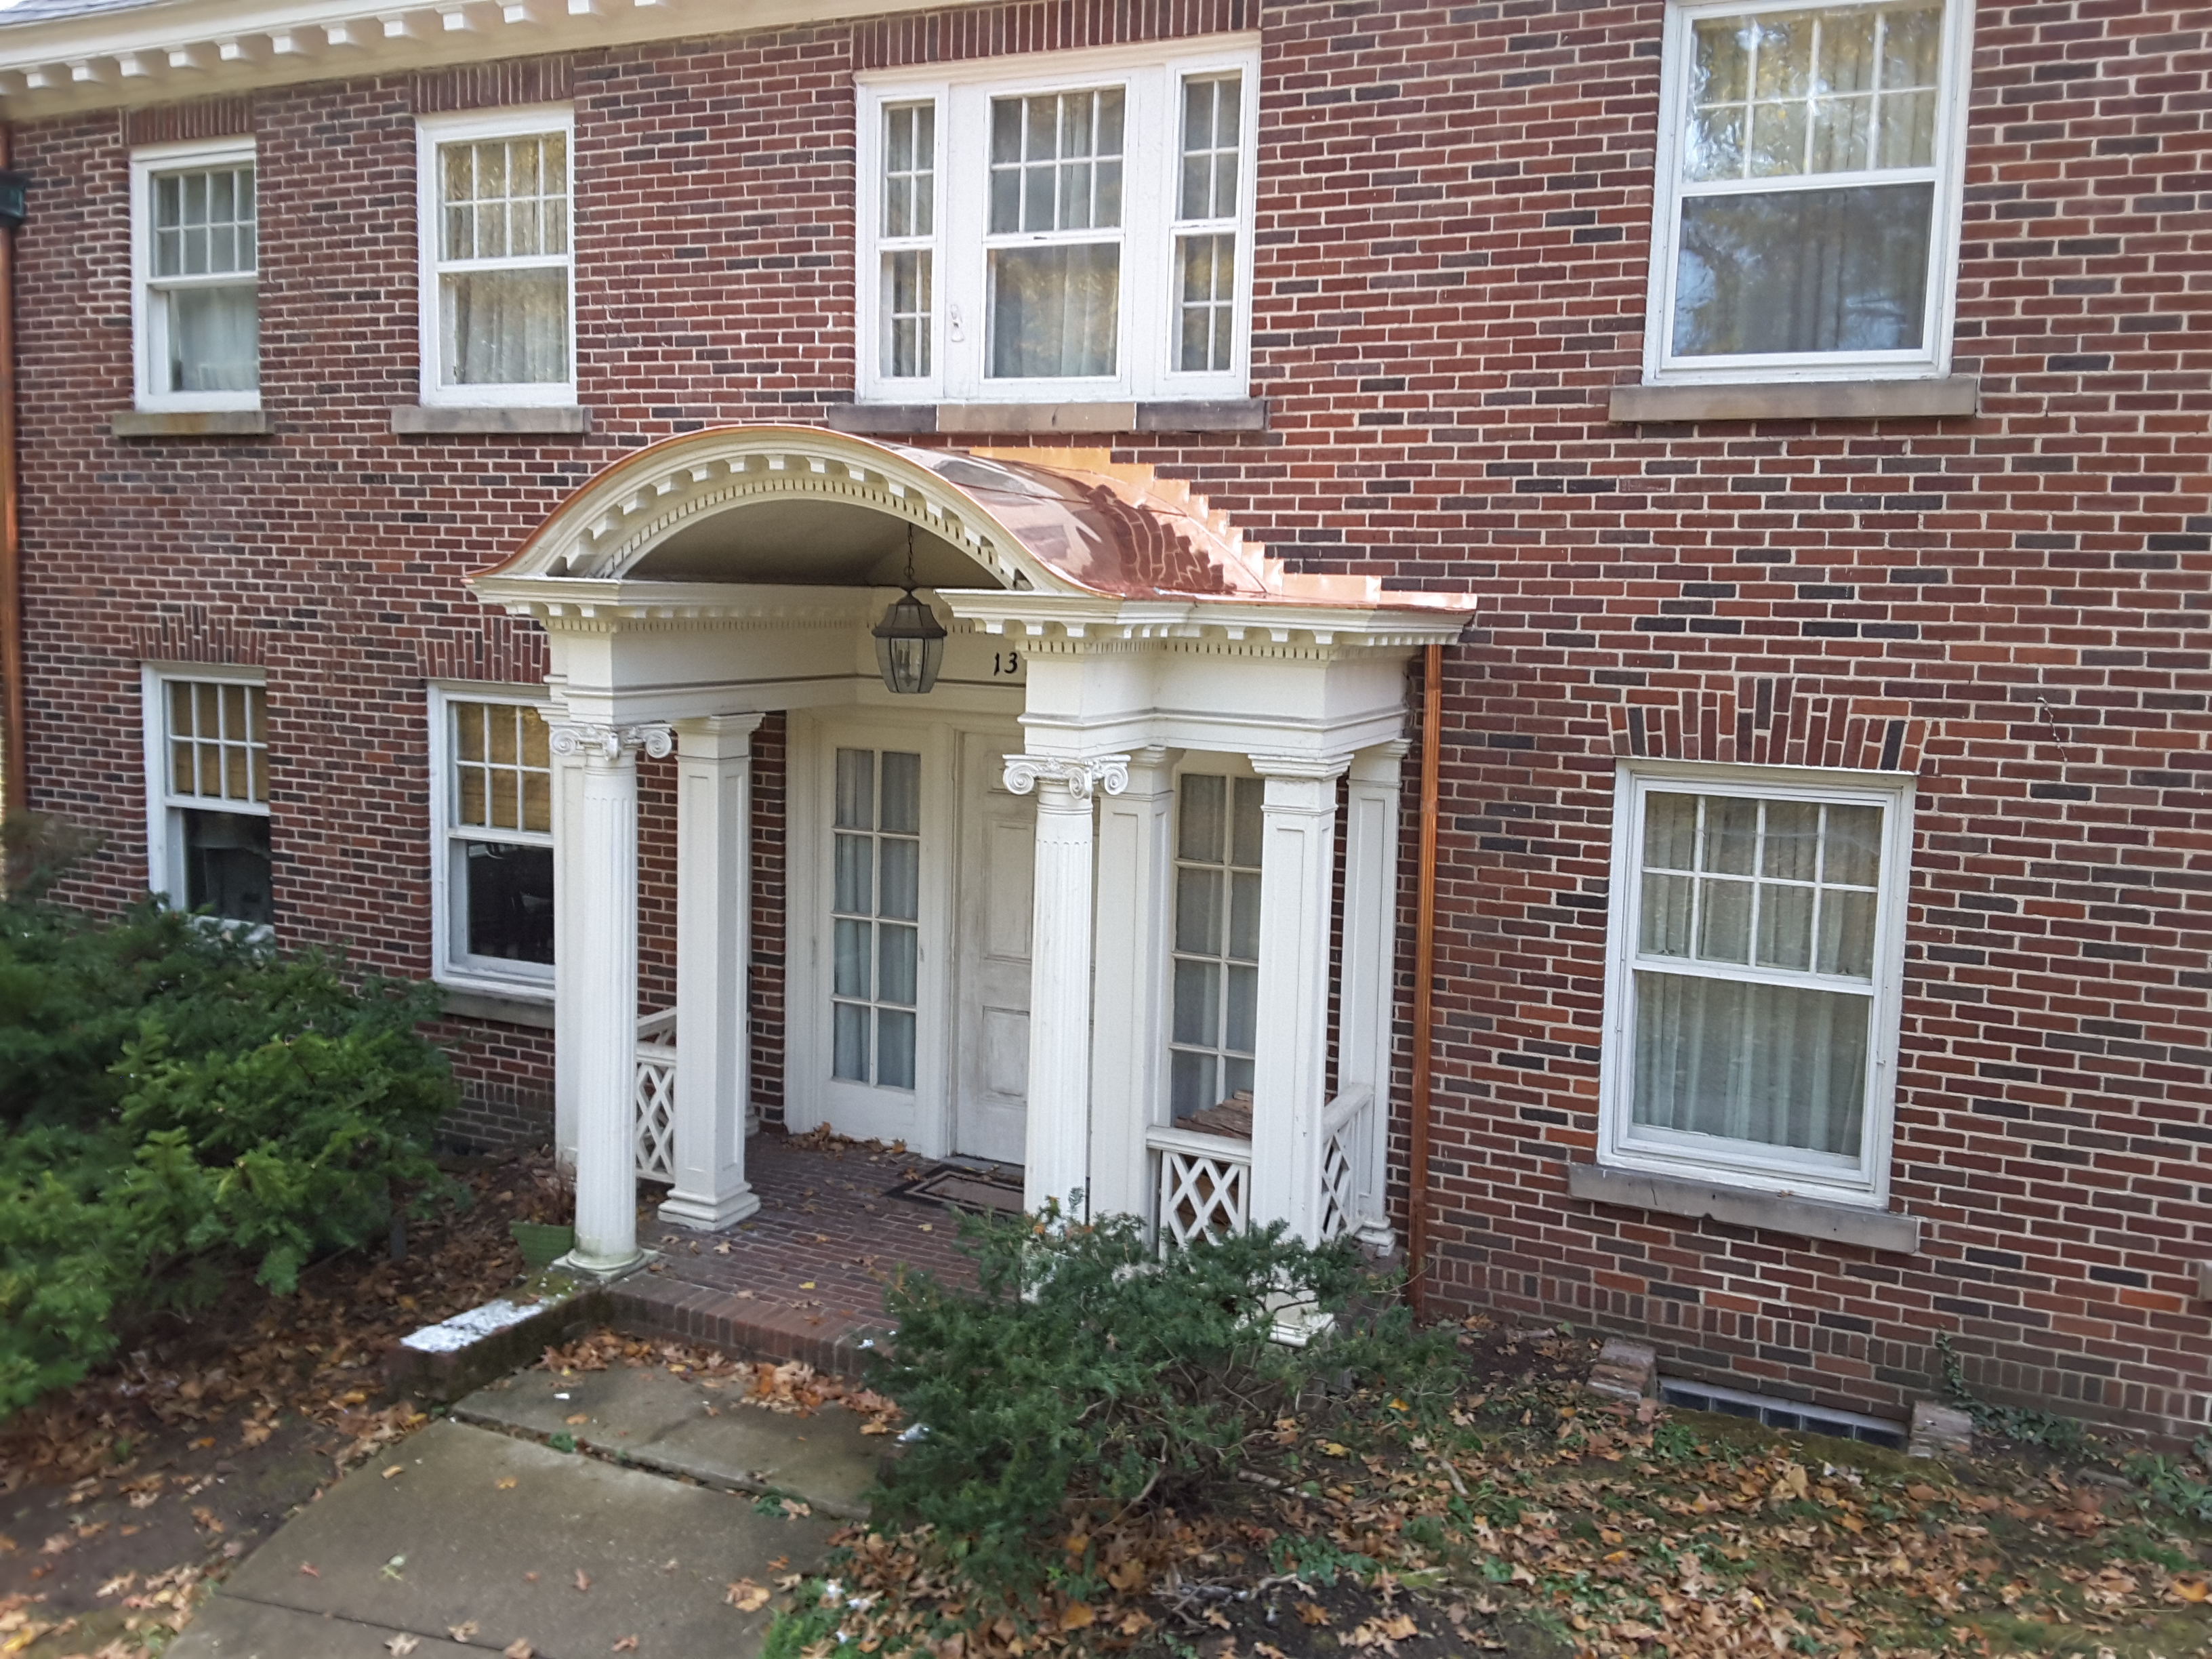
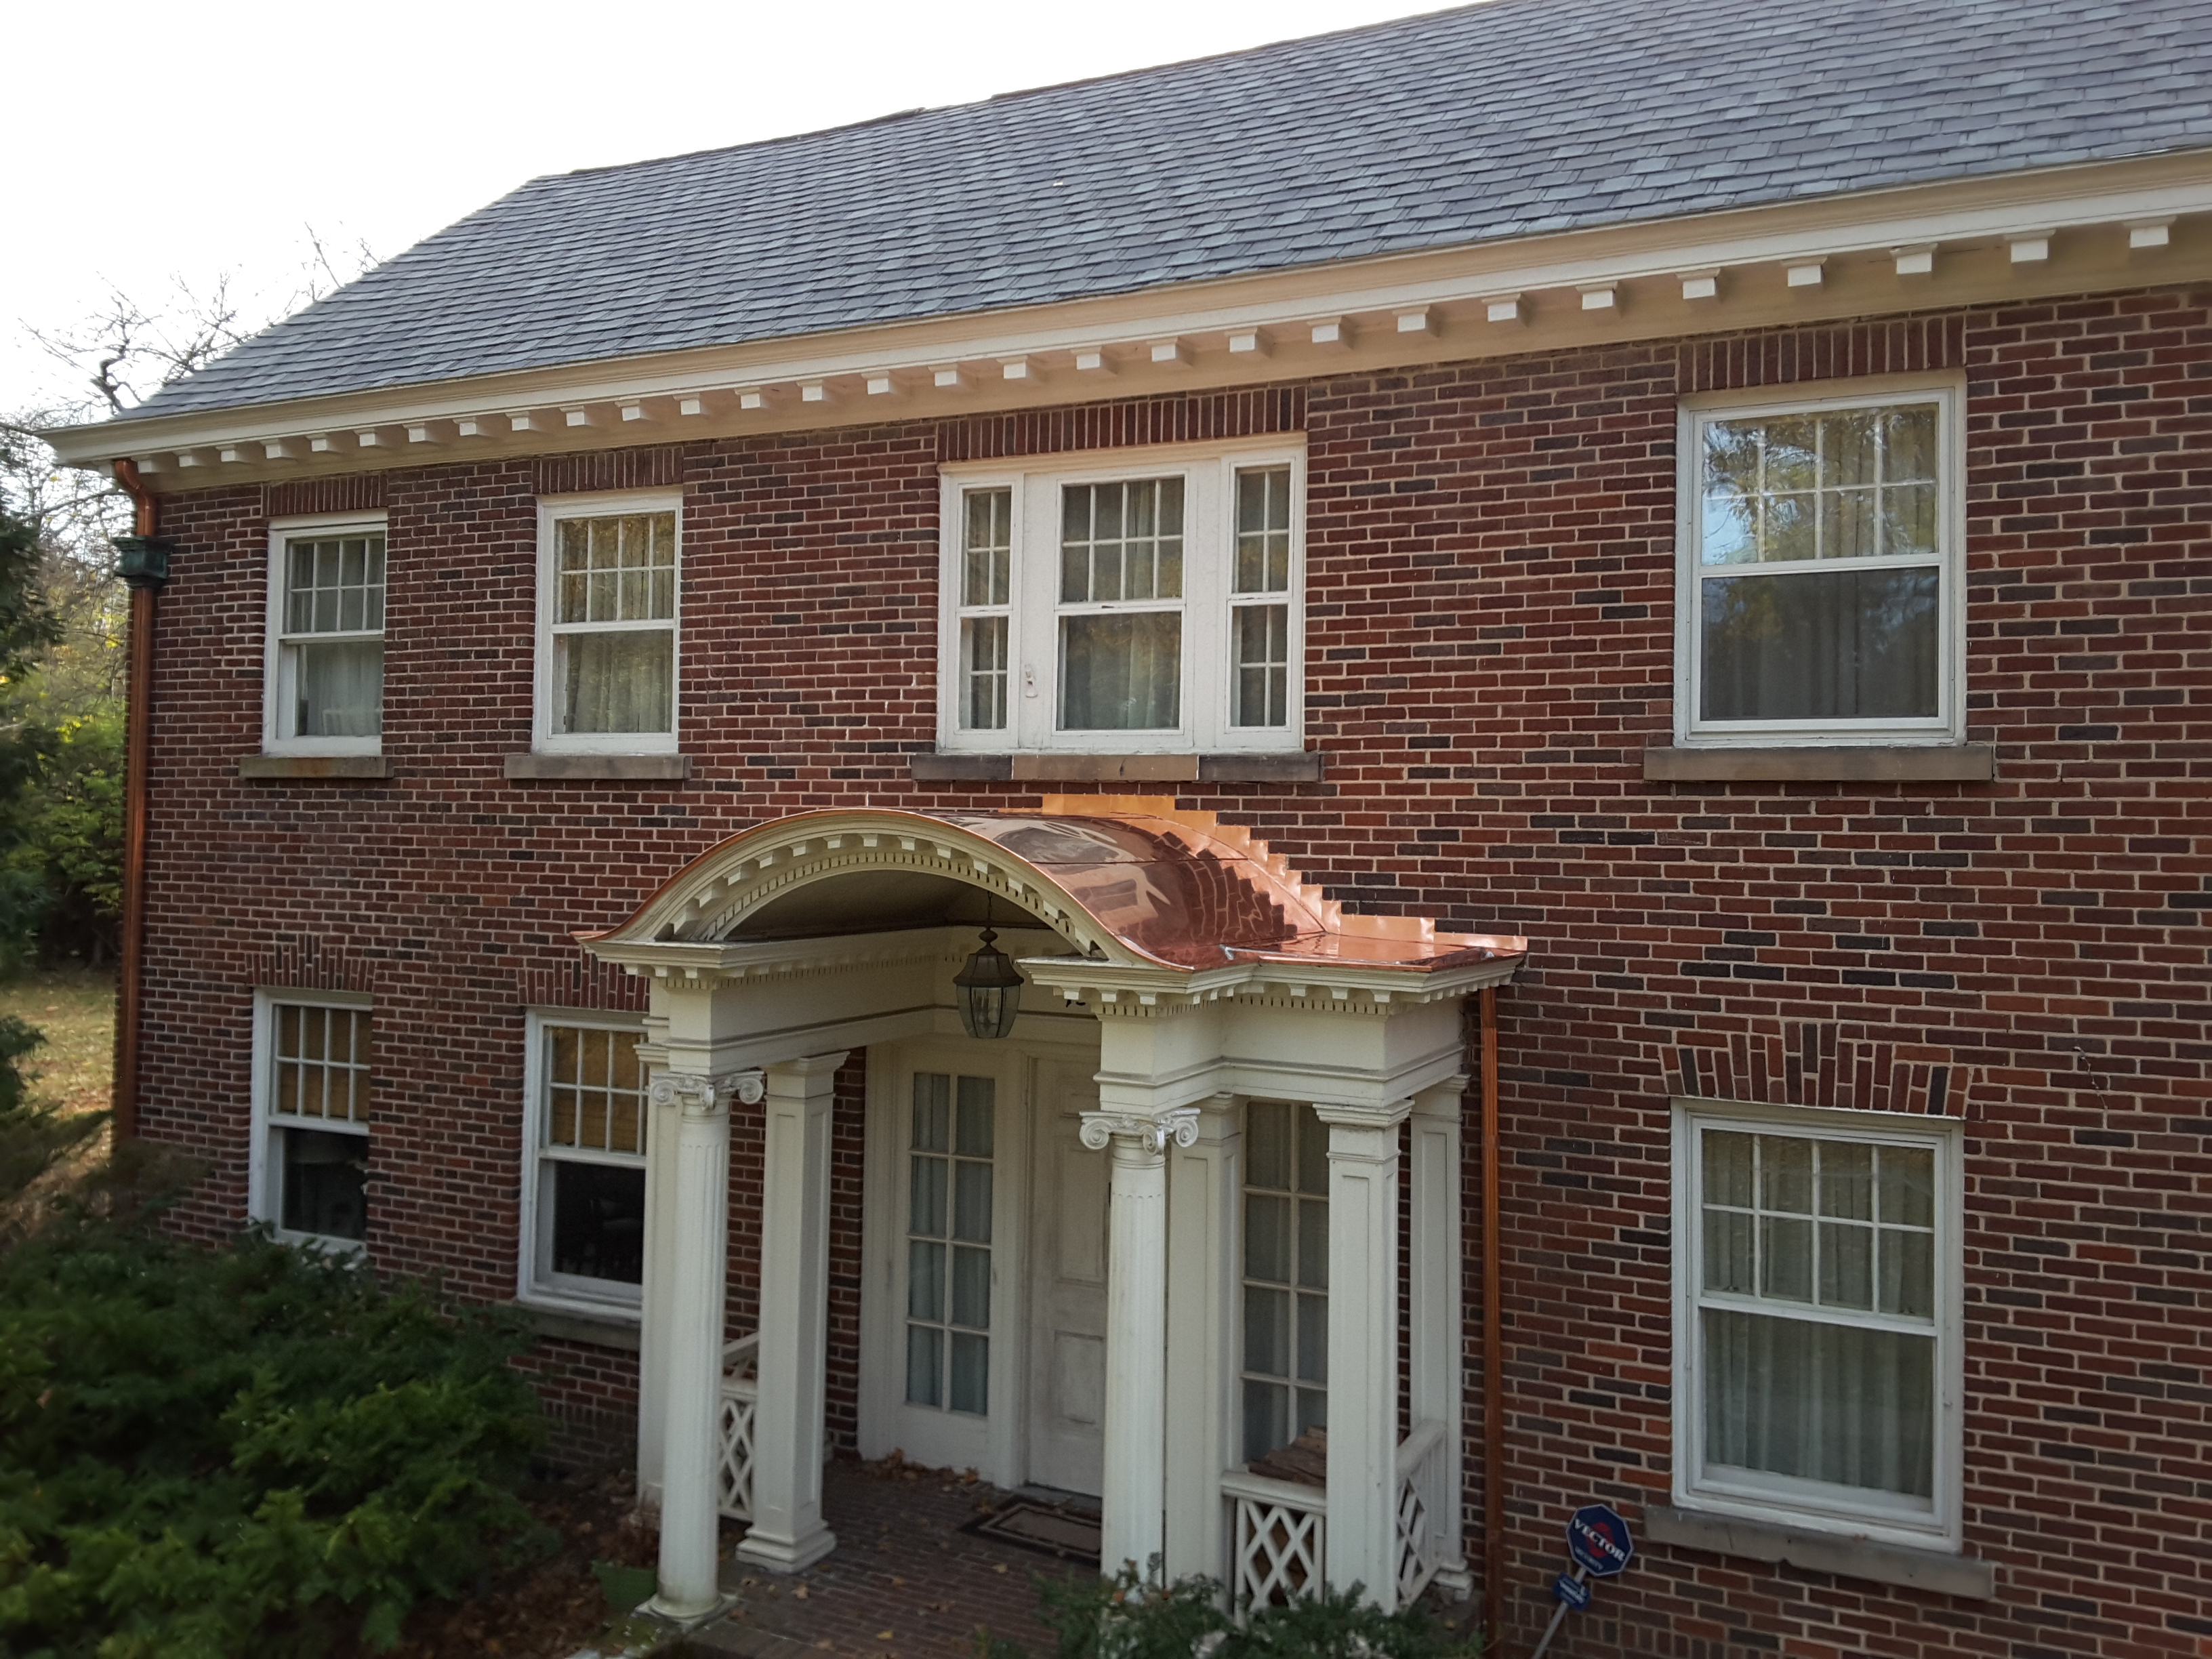
The original front entryway of this historic home had been roofed in copper when the house was built in the early 1900s. However, countless layers of ugly black tar had been added since that time. We were quite happy to return the front entryway roof to its original appearance.
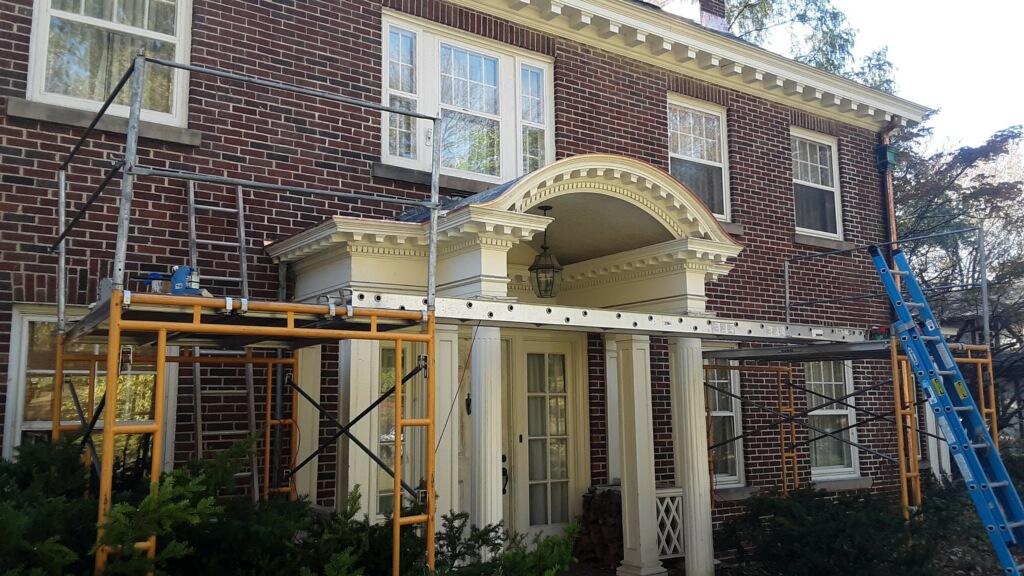
With scaffolding set up, we were then able to tear off all the entryway roofing and replace a bit of rotted roof decking. We also took the time to install Grace Ice and Water Shield as a 100% effective waterproof underlayment. We knew that this project was going to take several days to complete in late November and we wanted to keep the structure well protected during the entire time frame.
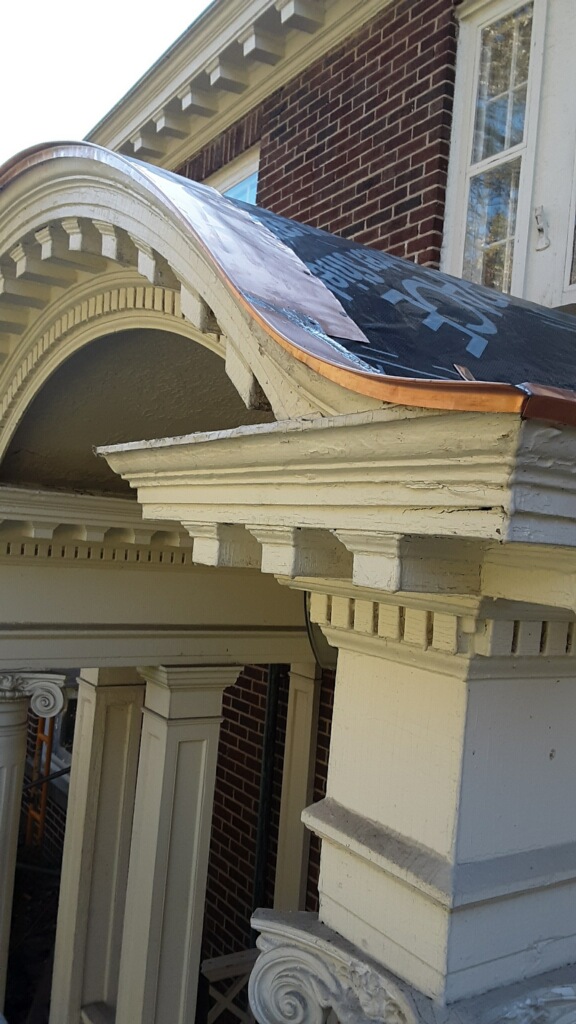
The new copper work was primarily handled by Kevin Hazlett and Tiernan King, with some extra help by Andrew Hazlett and Dillon Heavlin. The first copper installed was a curved piece of drip edge. Kevin fabricated this from one piece of copper over 10 feet long and perfectly matched the complicated bell shaped contour of the edge of the barrel roof. Kevin used a tool called a shrinker/stretcher to carefully form an inside curve which gracefully transitioned to an outside curve at the roofs apex and then equally, gracefully transitioned back to an inside curve on the opposite side of the roof. While Kevin worked with the drip edge, Tiernan began fabricating other pieces of copper to be installed after the drip edge was finished.
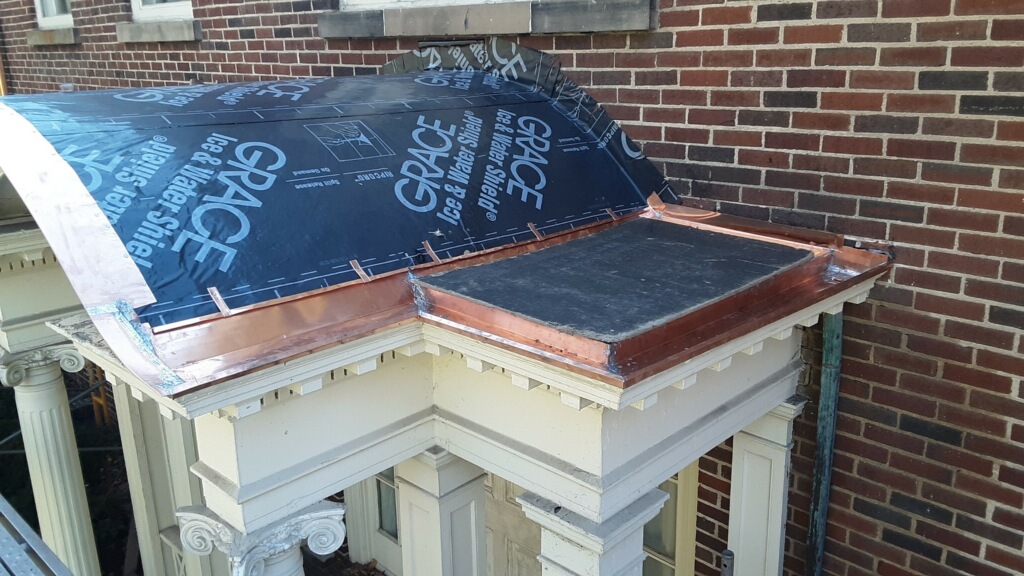
The large, curved, center section of the roof, called a barrel roof, had a small flat "wing" on both sides of the entryway, and both the flat wings and the barrel roof drain into built-in box gutters. Kevin and Tiernan needed to carefully fabricate and solder into place all of that work. Once the flat roof was in place a piece of fiberboard was temporarily placed over the lower copper work to protect it as the curved barrel was formed and installed.
The barrel section of the roof could have been formed several different ways. Because the main roof on the house overhangs this entryway, some ice may fall on the barrel in the winter. For that reason, we chose to form the barrel roof as a flat seam roof. Each panel of the barrel was carefully formed to attach to the drip edge and to panels above and below each piece while also having an upturn at the brick wall. Once again the shrinker/stretcher was needed to carefully form each panel into a curve. The edge of the roof along the wall was counter flashed with the flashing inset into the brickwork.